The Novice’s Guide to Composting, Part 2
Side note on worms: worms are sold by the pound, and the Subpod system recommends one pound of worms for the regular size, and half a pound for the mini. However, you can absolutely start with more worms to get everything going faster. There’s about 1000 worms in every pound. I opted to go with red wigglers, which are some of the most common composting worms. They’ll come with some worm castings and things to survive initially, but you should put them into their new home within the first 24 hours you get them.
Okay, so now we have our compost bin in the ground and the worms! So how do we ensure the worms survival? The following things may seem obvious, but I didn’t know about them, so I’ll say them anyway. The first time I set up the system, the internet convinced me I needed a bed of coconut coir (found at my local pet store), and I thought it would make sense to put some dirt in the bin. Worms need dirt right?? Turns out, coconut coir is a very reasonable thing to make bedding from, especially since it absorbs moisture well, but it’s not the only thing you can use. And you also don’t need any dirt. The second time I set up my system, I used shredded cardboard. And yes, I was that person who went and Google searched “how to shred cardboard” because tearing it up into little pieces by hand was a lot of work. Turns out you can just used a paper shredder, but make sure it can handle upwards of 16 sheets. The shredder I use shreds 18 sheets.
Stickers/labels should not be fed to worms, so make sure that’s been removed. But the new paper tape is compostable, so that can stay on the cardboard! Colored cardboard is fine, but if there’s a plastic-y covering or glossy print, rip off that top layer, or throw the whole thing into recycling because that’s a lot of commitment. And if you’re anything like me and shop online regularly, you won’t be running short on cardboard/paper anyway.
Right, so you’ll want to put down the bedding into the bin first. How much is really up to you, but make sure that there’s at least a few inches of bedding so the worms can get settled. Add a little water for some moisture. Then you just put the worms on top. They’ll look like one giant wriggling mass, which can be a little bit creepy and scary. But it’s okay! They’ll settle over the next week. Now close the bin and leave the worms alone for a week! Don’t add any food during this time to not overwhelm the worms. And when you do start feeding them, don’t dump all the food in all at once. Start small. Again, the worms need to acclimate.
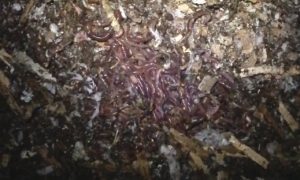
The other important thing to know right away is that you might not see the worms for a few weeks. They might be outside in the garden somewhere, exploring the area. But you’ll know if they’re eating food if you check how much is left every time. Don’t disturb them too much. Worms are fairly hardy but too much disturbance isn’t good for them. Eventually, they’ll come back into the bin and you can see them wriggling around and get emotionally attached like me.